Adding images to your pages using the WYSIWIG editor is fairly simple if you have images of the correct size and file format for the web. Preparing and uploading images is described in a later section, so for the purposes of this section let's assume that you have already uploaded some images to the images sub-folder under the OmniUpdate folder for your department. Here are the steps:
- Position your cursor on the page where you want to insert the image.
- Click the Insert/Edit Image button on the toolbar.
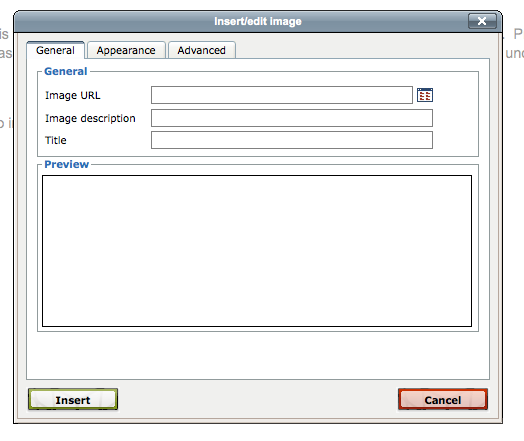
- Click on the Browse folders button next to the Image URL field (see Figure 1). This allows you to choose from files that are already uploaded to your images sub-folder on the production server.
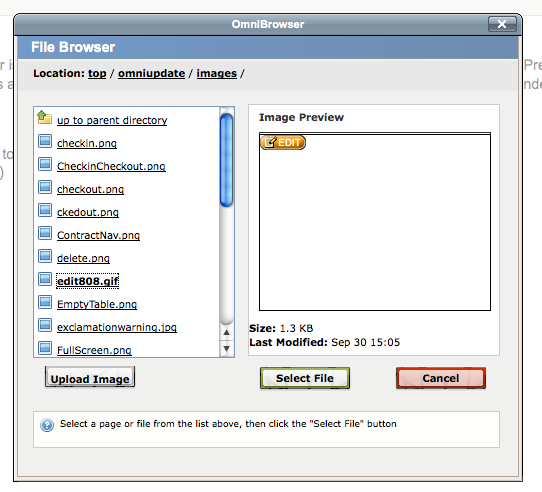
- Select the image file using the Choose Image dialog box (see Figure 2) Click Select Image.
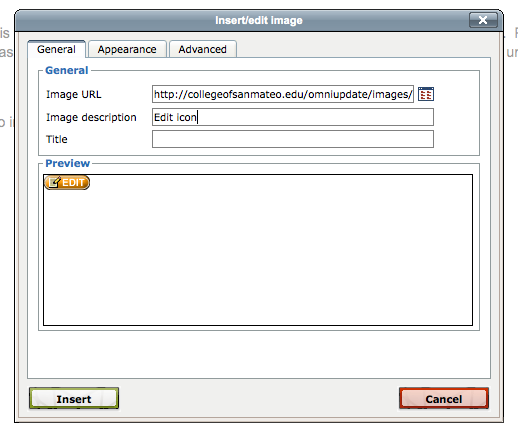
- Add a description for your image. This step is important, because it helps ensure that your pages are accessible to people with disabilities. The description does not appear on the page, but it may be used by screen readers or other assistive technologies. The description should be brief, but should describe the content of the image (see Figure 3).
- Add a Title for your image. The title can be the same as the description, but should be written in title case, with the first letter of each primary word capitalized. The title of the image is shown when a user hovers over the image with his or her mouse.
- Click Insert.
- After inserting an image you can select the image in the editor and resize it by dragging one of sides or corners to the appropriate position.
- If your image is small enough and you want text on the page to wrap around the image, you can select the image and then select Float Left or Float Right from the Styles pull-down menu in the toolbar.

Figure 2: File Browser

Figure 3: Add description
