Working with tables is probably the most complex task that you will need to do in the OmniUpate editor. However, if you are familiar with creating and editing tables in Word, and you familiarize yourself with the table editing toolbar buttons in OmniUpdate, you should also be able to create and edit sophisticated, attractive tables in OmniUpdate.
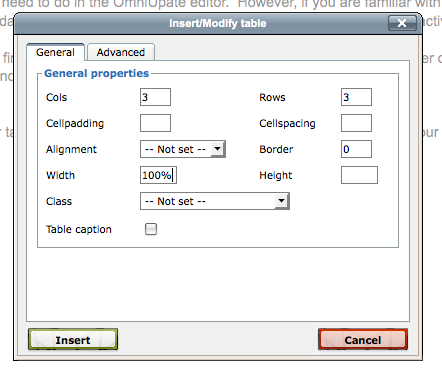
To create a table on your page, click on the Insert Table button (the first button on the last row of your editor toolbar). Select the number of columns and rows that you want for the table (you can always add more later). Leave the Cellpadding, Cellspacing, and other options empty for now (see Figure 1).
Figure 1: Inserting a Table

After clicking Insert you will see an empty table in your editor, outlined with light gray dotted lines (see Figure 2). Place your cursor in the one of table cells to add text.
Figure 2: Empty Table

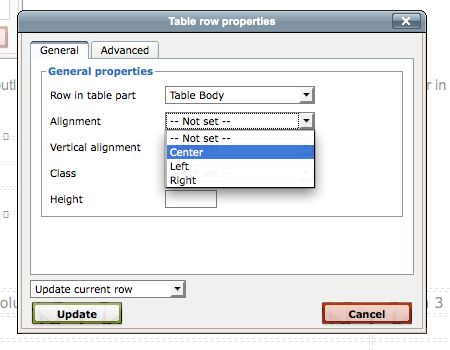
As you add text to cells the table columns will adjust their width. If you place the cursor anywhere inside the table and the right-click with your mouse you will get a menu with additional table options. You can use these options to add, remove, or merge rows or columns, or to edit other formatting options for your table. For example, you can place the cursor on a row and then use the editing options to center all text for the row, as shown in Figure 3.
Figure 3: Editing Table Properties
